Hi friends! Fancy seeing you here on my blog...it's been a while ;) I am really looking forward to posting here more frequently this year (hopefully!) Today I'm sharing our guest bedroom with you-- a room I haven't shared yet because it was just recently completed. It's a VERY small room (all our bedrooms are tiny, including our main bedroom), so I've had to get a bit creative with the use of space, storage and furniture placement. Also purging really helps ;)
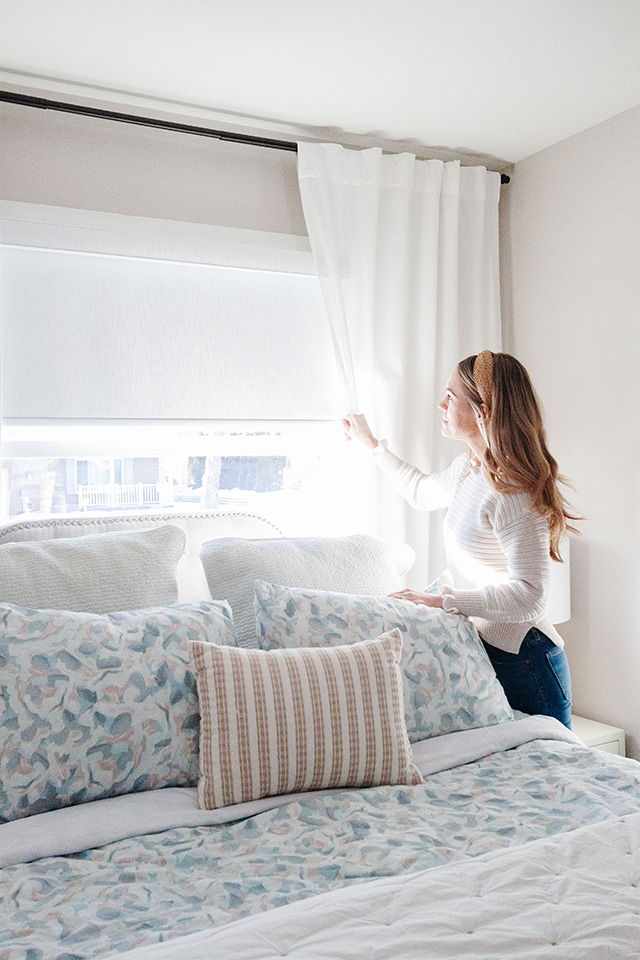
One of the main things we needed to do in both the guest room and the room next door to this one, which is my husband's office, was finally take down our paper shades (yes, I said paper haha!) and hang proper window treatments. I was deciding between a roller and a roman shade and I went with roller shades for both rooms, because although I prefer the look of a beautiful roman shade, they produce a large stack of fabric at the top of your window when they are drawn up, blocking a lot of light. Since I have a headboard to contend with in front of this window, it already blocks some light, so I needed something that would let in as much light as possible! Enter the roller shade. You'll see more about that below, but I am SO happy with how they turned out; I can't wait for you to see them. I get asked for affordable window treatments like these all the time and I'm so excited to finally have a fabulous recommendation-- Select Blinds. The experience was seamless from start to finish!
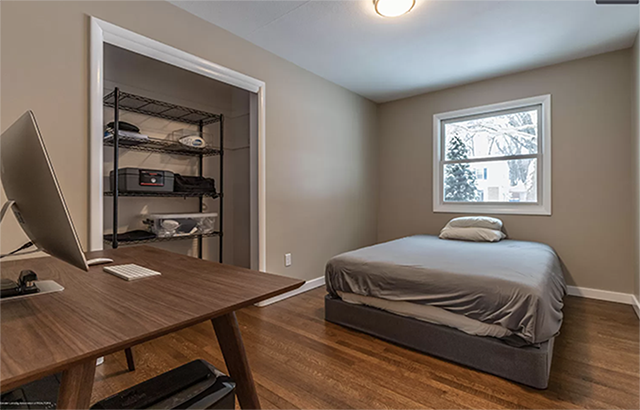
Anyways, more on that in a bit! Here's the BEFORE of the room (a listing photo from when we bought the house in 2019):
As you can see, the walls were dark, the closet had no doors (fun fact: the previous owner took ALL closet doors off and ditched them, so we had to buy doors for all of our closets when we moved in...ha!), and the window is slightly off centered (drives me bonkers!) so I wanted to find a way to make the eye think it
was centered. Also, as a side note, this room started as a guest room / my office combo, but I realized I never sat at my desk in here to work, so we removed the desk and added a dresser, which is much more practical for guests!
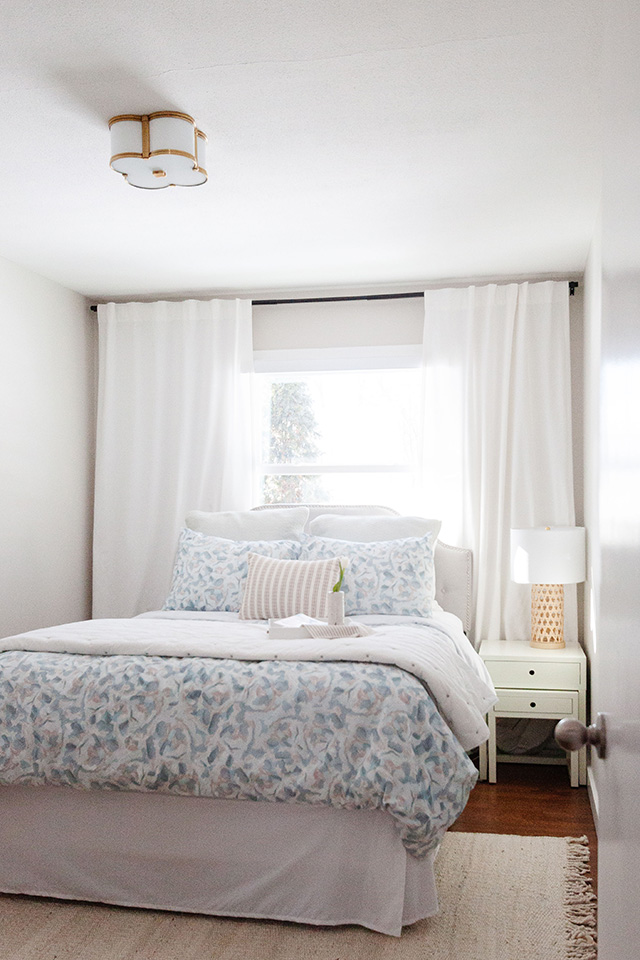
Here's the reveal:
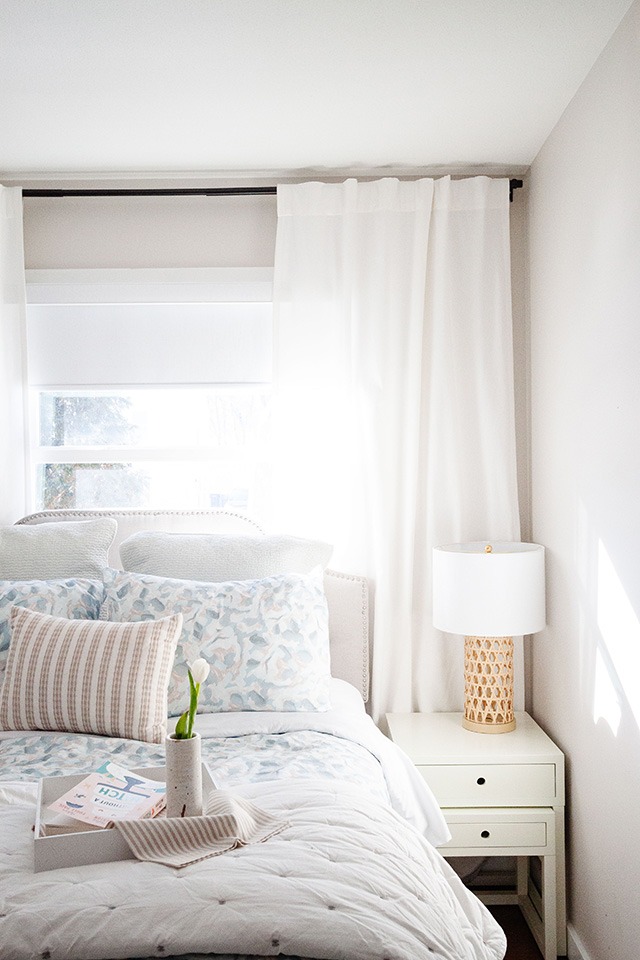
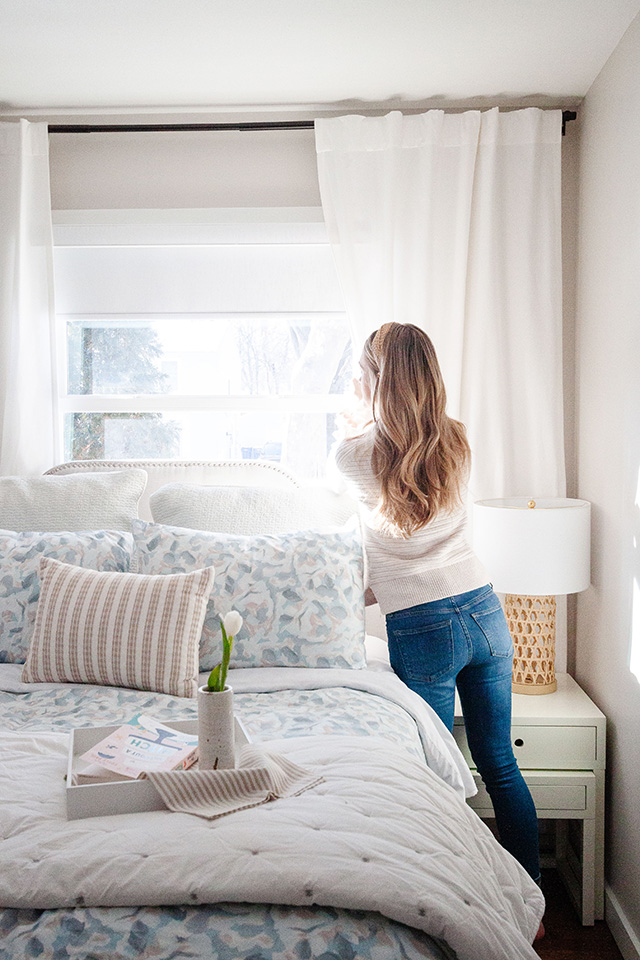
The first thing we did was paint the room. It's the same color as the main spaces in our home- Balboa Mist by Benjamin Moore. It's a lovely muted greige. Then, to trick the eye into thinking the window is centered, I hung curtains on the window wall that span the entire wall. Eventually I'd love to upgrade these curtains to a more professional and tailored look, but for now, these work :) Really the only place for the bed is in front of the window, which I think works well with the curtain situation. I don't love that the headboard blocks some light coming in, but it's okay. The room still gets a bunch of afternoon light!
We used our old nightstand (old from Serena & Lily) and I found this lamp at Homegoods last year. The bedding is also old (sorry!) from West Elm.
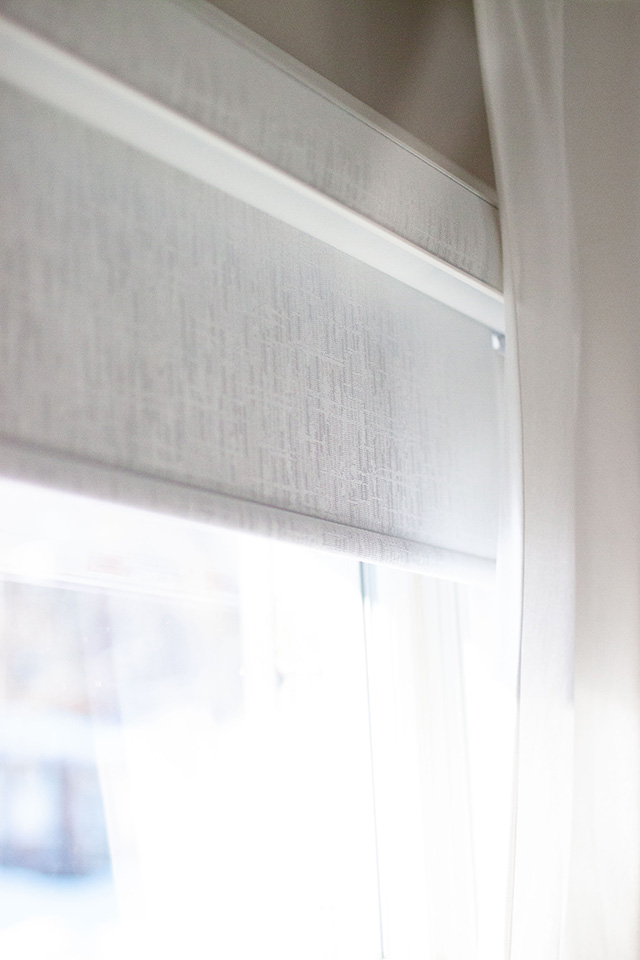
The roller shades have been amazing! They are so easy to work and they look beautiful, simple and tailored. We installed them ourselves, after ordering them to size on the Select Blinds website. My husband easily installed them in less than 30 minutes. What I love about roller shades is that the cassette (that top piece of the shade) is only about 3" long and attaches right under your window molding. When the shade is fully rolled up, there is nearly no blocking the window (only the 3" of the cassette!), allowing ample light in.
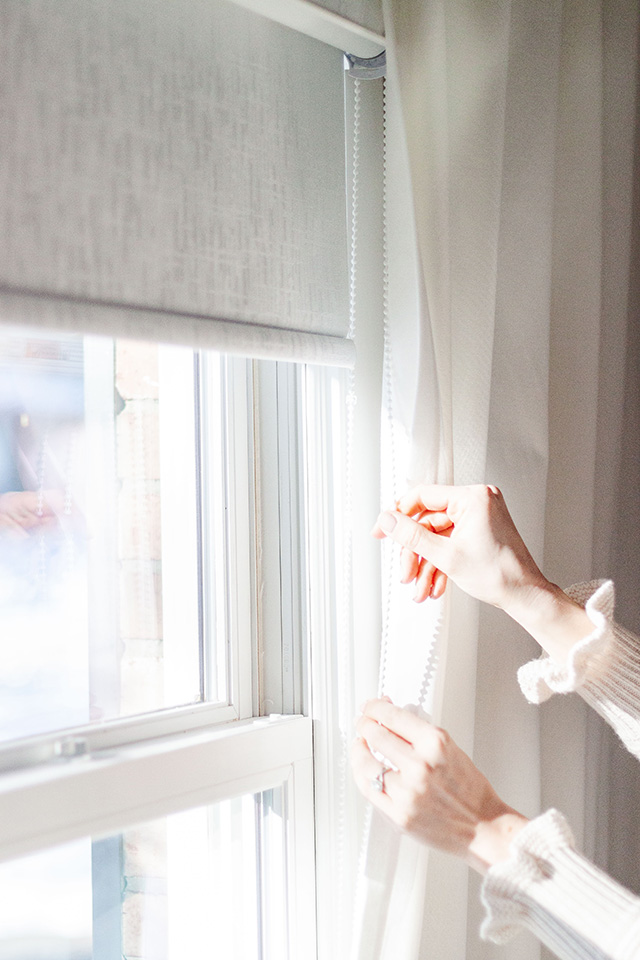
You can see below that there is a simple pull-chain on the side to allow you to lower and raise them (you get to pick the side the chain comes on).
We went with a blackout shade simply because this is a guest room, so we thought guests would appreciate total privacy. The office room, next door to this one, also has the very same shade, so that there would be unity from both inside and outside the house. The
fabric is really lovely-- it's this "Pearl" fabric that has a very subtle metallic thread in it to give it a bit of dimension. It's a very light gray color, blending perfectly with the scheme of the room. It's so neutral that it would be perfect for any room, really!
Pro Tip: When selecting roller shades, I always choose something with texture so that it appears more elegant and high-end. The materials that are starchy, rubbery or completely plain with no texture end up looking really commercial and cheap, so I'd steer clear of those.
Here's a better picture of the top "cassette" I was mentioning earlier. This is an option when building your roller shade and I would 100% always get one. Without it, your fabric roll would be exposed and look pretty messy. This hides the roll and gives it that finished, polished look!
The other side of the room has a dresser, mirror (love hanging a mirror the opposite wall of the window to reflect more light into the space!), and small side chair.
This "goodnight" wire sign was one of the first things I bought for my first apartment years ago. It was from Anthropologie (gone now) and I'm so happy I still have it because I think it's a really sweet addition to this room! I also thing it'd be adorable in a nursery one day...hopefully :)
This lamp I do have the link for! It's SO cute and perfect here. It has a functional dimmer, which is awesome for ambient lighting.
I wanted the rug to be really neutral and pull in the woven texture, so I got
this one from Boutique Rugs and I've been so happy with it.
That's our guest room! I love hosting friends and family, so I'm hoping this room sees a lot of use :)
Thanks for coming on the little tour!
xoxo
interior design website / services / portfolio